1200, 116719 and 162154 Cartridge: Moentrol with Integrated Transfer Valve
- Last updated
-
-
Save as PDF
This article will provide step-by-step instructions on how to replace the upper diverter cartridge in a Moentrol with Integrated Transfer Valve shower system. Moen has used three different diverter cartridges in this assembly, the 1200, 116719 and 162154 cartridges.
Preparation:
- The water supply shut off valves must be turned off- see article How to Turn Off the Water Supply to the Faucet.
- Recommended Tools: Phillips Screwdriver & Pliers
- The following instructions assume the handle and associated handle pieces have been removed. For additional details, visit Vertical Spa: Moentrol with Integrated Transfer Valve and select the type you are repairing. The faucet guide will contain specific information on handle assemblies associated with that style of product.
- We recommend covering the drain before beginning so to not loose any parts down the drain.
|
Egg-Shaped Escutcheon Plate (Prior to 2007):
|
|
Disassembly:
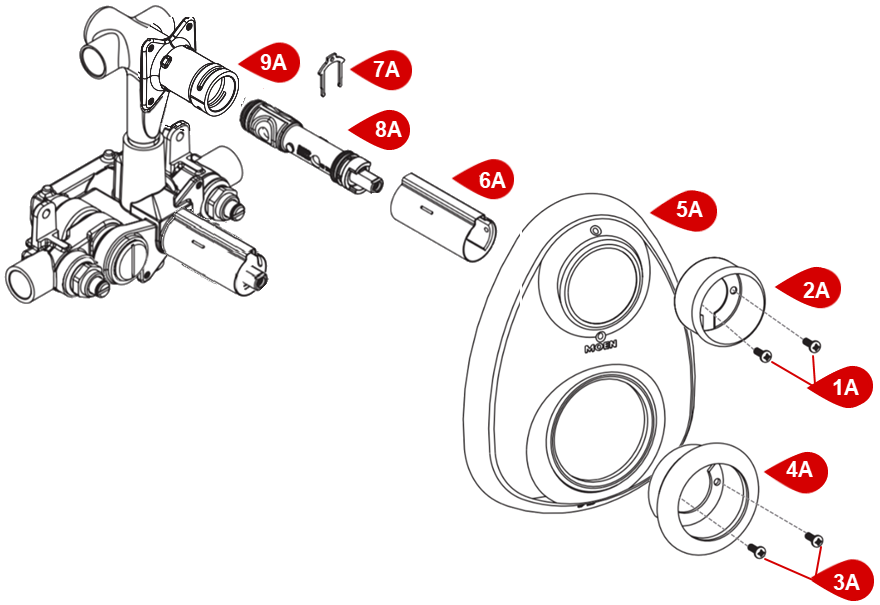
- To remove the upper mounting cup (#2A), use a Phillips screwdriver to unthread the upper mounting cup screws (#1A) counter-clockwise. Repeat this step for the lower mounting cup (#4A) and lower mounting cup screws (#3A).
- Slide off the escutcheon plate (#5A).
- Grab ahold of the stop tube (#6A) and pull it forward until it has been removed.
- Lift the tab at the top of the U-shaped copper colored retaining clip (#7A) just enough to grab it with your hand to fully remove. Be careful not to drop the clip (#7A) behind the wall.
-
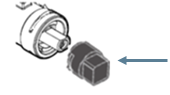
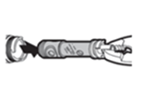
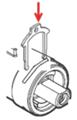
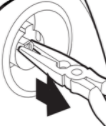
Using the plastic twisting tool (see Image 1 below) provided in the cartridge service kit (#8A), rotate the cartridge (#8A) 1/4 of a turn (90 degrees) in either direction (see Image 2 below). This will help loosen the cartridge (#8A). Remove the twisting tool from the top of the cartridge (#8A). Pullout the stem of the cartridge (#8A) until it stops. Using pliers, grab the stem of the cartridge (#8A) and pull the cartridge (#8A) out (see Image 3 below). This may require some effort. Note: It is highly recommended to clean and flush the valve body (#9A) before installing the new cartridge (#8A). See Valve Body Cleaning and Flushing for additional details.
|
Assembly:
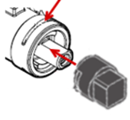
| 1. Slide the new cartridge (#8A) into the brass valve body (#9A). Use the twisting tool to position the cartridge (#8A) correctly in the valve body (#9A). The plastic tabs on the cartridge (#8A) must be centered on the slots on the valve body (#9A), which are located at the 12 and 6 o'clock positions. |
 |
| 2. Gently slide the copper clip (#7A) back into the brass valve body (#9A) on top of the cartridge (#8A). If you encounter any resistance, do not force the copper clip (#7A). The cartridge (#8A) may not be properly aligned (see step 1). If for any reason the copper clip (#7A) cannot be installed, the water cannot be turned back on to the shower system until the copper clip (#7A) is replaced. |
 |
| 3. Pull the brass stem of the cartridge (#8A) outward, add the white spacer, and rotate the stem of the cartridge (#8A) so the two flat sides of the brass stem are facing to the left and right. |
|
- Slide the stop tube (#6A) back onto the valve body (#9A).
- Position the escutcheon plate (#5A) with the word "Moen" upright and slide it onto the valve body (#9A).
- Position the upper mounting cup (#2A) so the screw holes lines up with the screw holes on the valve body (#9A). While holding the upper mounting cup (#2A) in position, use a phillips screwdriver to thread the upper mounting cup screws (#1A) clockwise until tight. Repeat this step with the lower mounting cup (#4A) and lower mounting cup screws (#3A).
|
|
|
Oval Shaped Escutcheon Plate (After 2007):
|
Confirm that the cartridge clip is installed and use pliers to pull the brass stem of the cartridge (#6A) outward. Rotate the stem of the cartridge (#6A) so the two flat sides of the brass stem are facing to the left and right.
|
Disassembly:
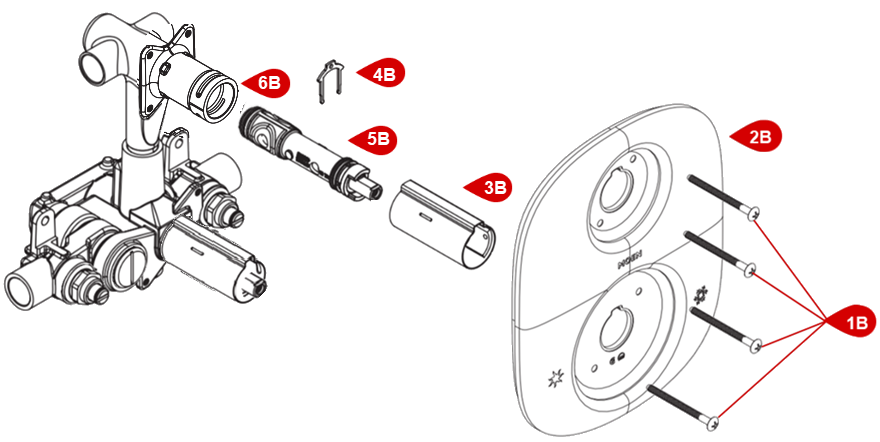
1. To remove the escutcheon plate (#2B), use a Phillips screwdriver to unthread each of the four escutcheon screws (#1B) counter-clockwise.
2. Grab ahold of the stop tube (#3B) and pull it forward until it has been removed.
3. Lift the tab at the top of the U-shaped copper colored retaining clip (#4B) just enough to grab it with your hand to fully remove. Be careful not to drop the clip (#4B) behind the wall.
4. Using the plastic twisting tool (see Image 1 below) provided in the cartridge service kit, rotate the cartridge (#5B) 1/4 of a turn (90 degrees) in either direction (see Image 2 below). This will help loosen the cartridge (#5B). Remove the twisting tool from the top of the cartridge (#5B). Pullout the stem of the cartridge (#5B) until it stops. Using pliers, grab the stem of the cartridge (#5B) and pull the cartridge (#5B) out (see Image 3 below). This may require some effort. Note: It is highly recommended to clean and flush the valve body (#6B) before installing the new cartridge (#5B). See Valve Body Cleaning and Flushing for additional details.
|
Assembly:
| 1. Slide the new cartridge (#5B) into the brass valve body (#6B). Use the twisting tool to position the cartridge (#5B) correctly in the valve body (#6B). The plastic tabs on the cartridge (#5B) must be centered on the slots on the valve body (#6B), which are located at the 12 and 6 o'clock positions. |
|
| 2. Gently slide the copper clip (#4B) back into the brass valve body (#6B) on top of the cartridge (#5B). If you encounter any resistance, do not force the copper clip (#4B). The cartridge (#5B) may not be properly aligned (see step 1). If for any reason the copper clip (#4B) cannot be installed, the water cannot be turned back on to the shower system until the copper clip (#4B) is replaced. |
|
| 3. Pull the brass stem of the cartridge (#5B) outward and rotate the stem of the cartridge (#5B) so the two flat sides of the brass stem are facing to the left and right. |

|
|
4. Position the escutcheon plate (#2B) so the word "Moen" appears upright and slide it onto the valve body (#6B).
5. Using a Phillips screwdriver, thread each of the four escutcheon screws (#1B) clockwise until tight.
|
|
For additional information on Moen products visit solutions.moen.com and select the type of product you are repairing. The guide will contain repair details, troubleshooting and specific information on assembling handles associated with that style of product.
Still Not Finding What You're Looking For?
Contact Us or Call 1-800-BUY-MOEN
Non US? Moen Canada | Other International Sites