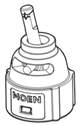
205013 Cartridge with Locking Pin: Kitchen Faucet
| Effective January 2022 the 205013 service kit was updated to include a new cartridge nut. The new version of the kit will eliminate the locking pin. If the 205013 kit you received does not include the locking pin, it is the updated version, do not attempt to add your original locking pin to the assembly. | ||||
|
►CAUTION — TIPS FOR CARTRIDGE REPLACEMENT: Always turn water supply OFF before removing existing faucet or disassembling the valve. Open faucet handle to relieve water pressure and ensure that complete water shut-off has been accomplished. For additional information, see article How to Turn Off the Water Supply to the Faucet.
|
(Includes 3/32" Hex Wrench and Set Screw, not pictured) |
|||
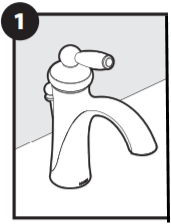
Cartridge Removal |
|
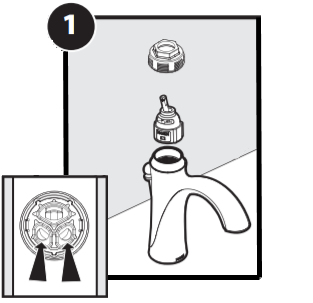
Step 1
|
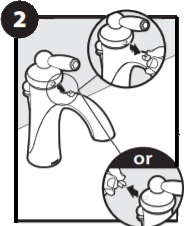
Step 2
|
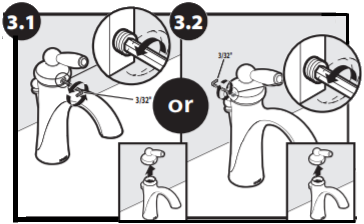
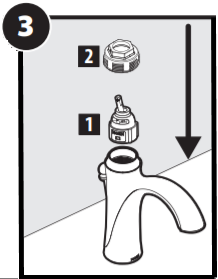
Step 3
|
|
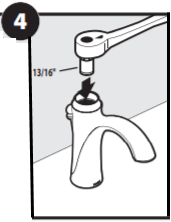
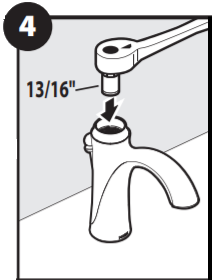
Step 4
13/16" Socket Wrench or Adjustable Wrench |
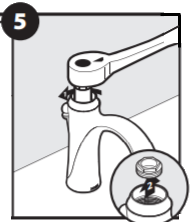
Step 5
|
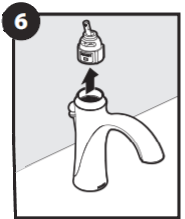
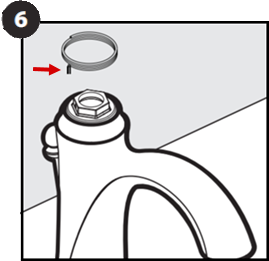
Step 6
|
Cartridge Replacement |
|
Step 1
|
Step 2: IMPORTANT
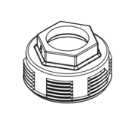
Replace Cartridge Nut. |
Step 3
|

|
Step 4
|
Step 5
Tighten the Cartridge Nut hand tight, then rotate an additional 90° (1/4 turn) with a 13/16" Socket Wrench or Adjustable Wrench. |
Step 6
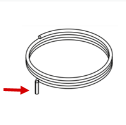
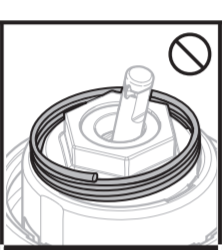
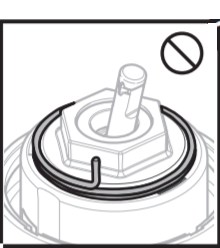
Position the Locking Pin so that the leg of the pin will fit into a clear opening. The pin assembly will rest flush on the faucet. |
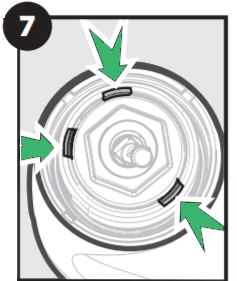
Step 7
|
|
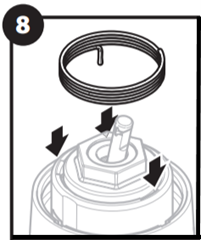
Step 8 If the Locking Pin does not fit flat, rotate and use a different opening. |
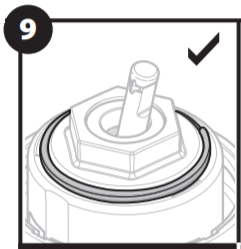
Step 9
|
Installing the Handle |
|
Step 1 Place the Handle on top of the silver stem of the Cartridge. |
Step 2 Confirm the Set Screw is in the Handle (a new one is provided in the Cartridge kit). Tighten the Set Screw clockwise with the 3/32" Hex Wrench. |
Step 3 Push the Plug Button back into the screw hole on the handle. You may now turn your water supply back on. For additional information on Pullout Sprayer Faucets, visit Top Handle with Pullout Sprayer Faucets. |
For additional information on Moen products visit solutions.moen.com and select the type of product you are repairing. The guide will contain repair details, troubleshooting and specific information on assembling handles associated with that style of product.
Still Not Finding What You're Looking For?
Contact Us or Call 1-800-BUY-MOEN
Non US? Moen Canada | Other International Sites