How to Unjam a Garbage Disposal
|
When a garbage disposal stops working, it may fail to turn on, grind waste, or produce only a humming sound. These symptoms typically indicate a jam in the system. Not all disposals are designed to handle every type of waste. The unit’s power—rated at 1/3, 1/2, 3/4, or 1 horsepower—determines what it can effectively grind. Smaller units are not intended to pulverize bones or process fibrous materials like husks. These items can become lodged or wrapped around internal components, preventing the disposal from operating properly. When this happens, the motor may hum because it’s unable to turn the grinding mechanism. Repeated attempts to run the unit can trip the internal breaker, shutting the disposal off completely. At that point, it will no longer grind, move internally, or make any sound. This article will guide you through a simple process to clear jammed material and reset the internal breaker, restoring your disposal to full functionality. |
|

| To understand how the garbage disposal operates please review the following video before proceeding: Moen Garbage Disposals |
Definitions and Terms: |
|
1. Splash Guard: Prevents food from splashing out from the disposal. It is the black rubber piece that sits in the center opening of the Sink Flange. 2. Sink Flange: The metal ring that sits in the sink's drain opening. 3. Swivel Impellers: The Swivel Impellers swing into position when the unit is turned on and guide the food to the Grind Ring. Made of heavy duty metal. 4. Turntable: The Turntable spins forcefully while the Swivel Impellers direct the food toward the Grind Ring. It is made of metal. 5. Grind Ring: Food is pushed over against the Grind Ring from the Swivel Impellers and with the force the food is grated into fine particles. It is a metal ring that is located along the outer edge of the Turntable. 6. Reset Button: Resets the disposal's internal breaker. It is a red button located on the opposite side of the disposal's power cord. |
|
|


Preparation: |
Tools Needed: |
|---|---|
|
Moen Part #1037 |


Step 1. Remove Splash Guard: |
|
There are two styles of Splash Guards (1) that exist. One that is integrated in the mounting hardware system. The other is removable. If your garbage disposal has a removable Splash Guard (1) you should be able to grip it from the top and gently but firmly pull upward. If your garbage disposal has an integrated Splash Guard (1) in the mounting hardware system it will remain in. Continue to Step 2. |
|
Splash Guard (1) |
Splash Guard In the Garbage Disposal |
Splash Guard Out of the Garbage Disposal |

.png?revision=1)
Step 2. Clear Foreign Objects: |
|
Before proceeding, verify that the power is off. Using a flashlight, check for any items that has not passed through the garbage disposal system. These may be causing the issue. Example:
Using tongs or needle nose pliers, remove any foreign object(s). |
Step 3. Check For Restrictions In Movement: |
|
Using the Un-jamming wrench, Moen Part #1037, insert the wrench side through the opening of the sink. Place the wrench flat on the floor of the Turntable (4). The two ends of the Un-jamming wrench should sit diagonally and secured against the two Swivel Impellers (3). Begin to turn clockwise or counter-clockwise to rotate the Turntable (4).
|
The force provided against the Swivel Impellers (3) should allow the entire Turntable (4) to be rotated manually. This will also allow anything trapped in the Grind Ring (5) to pass through the system. Continue this rotation until you are able to rotate the Turntable (4) clockwise or counter-clockwise at least two full revolutions insuring it has released. Remove the Un-jamming wrench from the disposal opening.
|


| If the Splash Guard (1) was removed, you can now reinstall it in the sink. Insert the Splash Guard (1) with the cup shaped side in first. Press down on the outer edge until it is snug and secured in the sink's opening. |  |
Step 4. Reset Motor: |
|
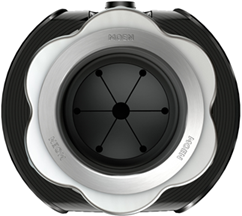
The final step is to reset your garbage disposal. Continually attempting to power on a jammed unit may have caused the internal garbage disposal breaker to trip. The Reset Button (6) is found in the opening towards the bottom of the garbage disposal, opposite the side of where the power cord comes out. Depending on the garbage disposal, the Reset Button (6) may be set back slightly and may require a screwdriver to prod it. Firmly push the Reset Button (6). Before testing the unit, it is important to follow these next steps in order.
|
.png?revision=1&size=bestfit&width=221&height=266) |
|
With all the safety measures in place you can now test the garbage disposal by turning your unit on.
|
Step 5. If The Issue is Not Resolved: |
|
Please visit: "My Disposal Has No Power" for additional troubleshooting or, call our Consumer Support team at 1-800-BUY-MOEN (U.S./Canada). You can also email us from our contact form: Moen U.S. | Moen Canada | Other International Sites |