Leak Around Top: New Garbage Disposal
|
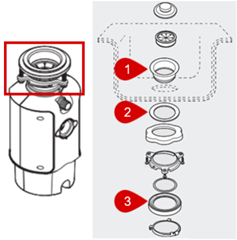
How to diagnose a problem with a Moen garbage disposal-This article deals with leaking around the top of the disposal. This information is specifically for newly installed disposals, not exisitng units. Leak Test
|
|
Leaking around the top of a garbage disposal is usually caused by one of the following.Not enough sealant usedIf there is too little or no sealant used under the sink flange than it can result in leaking around the sink flange. Black rubber or fiber gasketThe gasket needs to be seated flat against the underside of the sink. Loose screwsIf the mounting hardware screws are loose this will allow for movement which can result in leaking. Damaged cushion mountReplace part (Moen Part # 1824). |
For a comprehensive guide, visit solutions.moen.com and select the type of garbage disposal you are repairing. The garbage disposal guide will contain specific information associated with that style of product.
Still Not Finding What You're Looking For?
Contact Us or Call 1-800-BUY-MOEN
Non US? Moen Canada | Other International Sites