Shower Handle: M-Core Valve-Multi-Piece Handle Mechanisms
Preparation:
- The water supply shut off valves must be turned off-see article How to Turn Off the Water Supply to the Faucet.
- Recommended Tools: 3/32" Hex Wrench
- We recommend covering the drain before beginning so to not lose any parts down the drain.
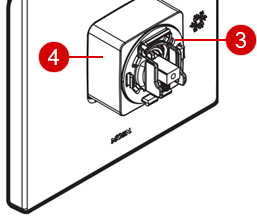
Parts List (Not all parts used on every style) |
|
5 Valve Body |
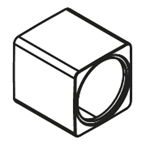
4 Sleeve |
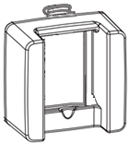
3 Handle Adapter |
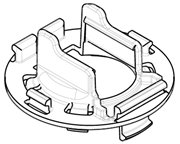
2 Handle Hub |
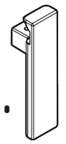
1 Handle and Set Screw |
Handle Mechanism Disassembly |
|
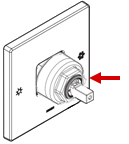
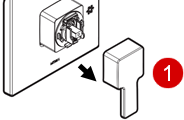
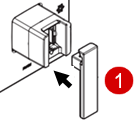
Step 1. Using a 3/32" Hex wrench, loosen the Set Screw (1) until you can remove the Handle (1). |
 |
| Step 2. Before removing additional parts, determine the handle mechanism type |
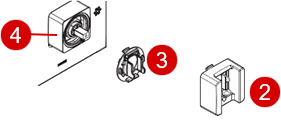
Handle Mechanism Type A: Includes Handle Hub (2)
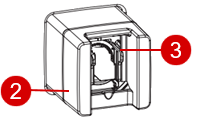
The Handle Hub (2) and Handle Adapter (3) are assembled together and will generally remain connected when removed. To remove these two parts, unsnap the Handle Hub/Adapter (2/3) from the Sleeve (4) and slide it off the assembly. |
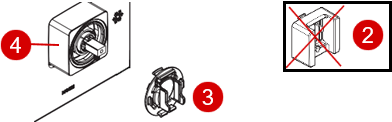
Handle Mechanism Type B: No Handle Hub (2)
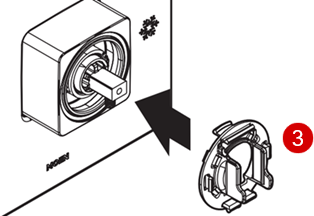
Unsnap the Handle Adapter (3) from the assembly. |
|
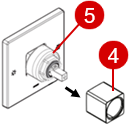
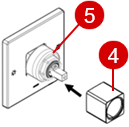
Step 3. Slide the Sleeve (4) off of the Valve Body (5).
|
Handle Mechanism Assembly |
|
Step 4. Slide the Sleeve (4) onto the Valve Body (5). |
 |
Based on your handle mechanism type (determined in Step 2) move to Step 5. |
Step 5. Handle Mechanism Type A |
|
If your Handle Hub (2) and Handle Adapter (3) are assembled, proceed to "Connecting to Shower Assembly". |
Reassembling Handle Hub (2) and Handle Adapter (3): Align the tab on the back of the Handle Hub (2) with the slot on the front of the Handle Adapter (3) and snap the front of the Handle Adapter (3) into the back of the Handle Hub (2). See "Handle Hub (2)" and "Handle Adapter (3)" images. |
Handle Hub (2) The Indent is on the bottom of the front side.The tab is on the top of the back side.
|
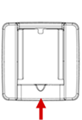
Handle Adapter (3) The slot is on the top of the front side. The indicator arrows are on the top of the back side pointing up
|
|
Connecting to Shower Assembly: Snap the 2 pronged tabs located on the back of the Handle Adapter and Hub Assembly (3 & 2) into the Sleeve (4). Rotate the Handle Hub (2) so that it is parallel to the Sleeve (4) as shown. Move to Step 6. |
 |
Step 5. Handle Mechanism Type B |
|
The back of the Handle Adapter (3) has two arrows that indicate the up position. With the back of the Handle Adapter (3) facing the Sleeve (4), securely snap the Handle Adapter (3) in place. |
 |
 |
|
Step 6. Using a 3/32" Hex wrench, tighten the Set Screw (1) into the Handle (1) until secure. |
Handle Mechanism Type A
|
Handle Mechanism Type B
|

For additional information on M-Core shower products, visit Single Handle Shower: M-Core at Solutions.moen.com.
Still Not Finding What You're Looking For?
Contact Us or Call 1-800-BUY-MOEN
Non US? Moen Canada | Other International Sites