Shower Handle: U231 and U361 Independent Transfer Valve
 |
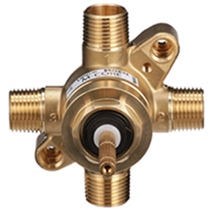
The M-Core U231 and U361 transfer valves were introduced in 2020 and are designed to divert water from one shower device to another (example: body sprays to a showerhead). Both the U231 and U361 transfer valves require either a PosiTemp or an M-Core shower valve to provide water to supply to the system.
|
Preparation:
- The water supply must be turned off- see article How to Turn Off the Water Supply to the Faucet.
- Recommended Tools: 3/32" Hex Wrench, Needle-Nose Pliers
- We recommend covering the drain before beginning so to not lose any parts down the drain.
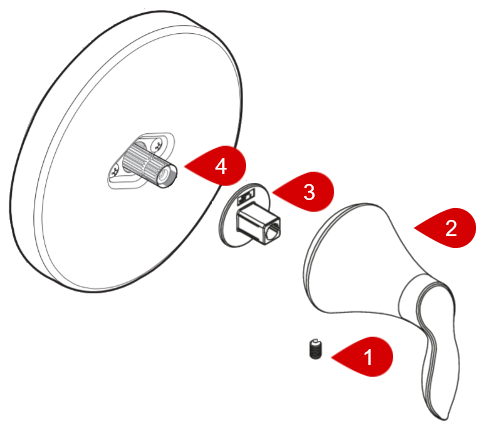
Set Screw: Under Lever |
|
Note: Some models have a removable cap on the front of the handle and a set screw under the lever. It is not necessary to remove the cap.
If this is not your handle mechanism, see Vertical Spa: Transfer Valves article to learn more about the different handle mechanism types. |
|
For additional information on Moen products visit solutions.moen.com and select the type of faucet you are repairing. The faucet guide will contain repair details, troubleshooting and specific information on assembling handles associated with that style of product.
Still Not Finding What You're Looking For?
Contact Us or Call 1-800-BUY-MOEN
Non US? Moen Canada | Other International Sites