Moen Solutions

Two Handle 4" Mini Wide Spread: Threaded Hub

Moen produces a variety of two handle bathroom faucets. The interior components and assembly are not the same for each model. This article will explain one of the most common handle assemblies referred to as a Threaded Hub Lever. This faucet style utilizes a 1224 cartridge.

Preparation: 

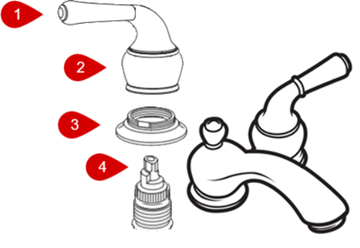
threaded hub mini widespread.png

Disassembly:

  1. While holding the lever (#1) stationary, unscrew the base of the handle hub (#2) counter-clockwise to remove the complete handle.
  2. If removing the escutcheon (#3), move to the section in this article titled Escutcheon Removal: 3 Versions.

To replace the cartridge see article 1224 Cartridge: Two Handle 4" Mini Wide Spread Bathroom Faucets.

Assembly:

  1. The top of the cartridge stem matches the profile inside the handle. Use pliers to adjust the cartridge stem if needed.
  2. Place the handle assembly on top of the faucet in the off position.
  3. While holding the lever (#1) stationary, thread the base of the handle hub (#2) clockwise to install the complete handle.
Escutcheon Removal: 3 Versions

Prior to 1999: Part #97547

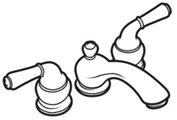
For Monticello Models (4560)

4560 line art.png


escutcheon prior 1999.png


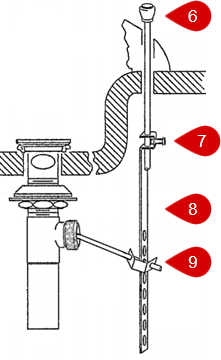
drain breakdown.png

Image 1

remove spout.png

Image 2

clamp screw.png

To remove the escutcheon (#3), you will need to remove the spout and loosen the hardware first. This will require two people.

  1. Disconnect the pivot rod clip (9) from the pivot rod strap (#8). Loosen the lift rod strap screw (#8) until the lift rod (#6) lifts out from the top of the faucet.
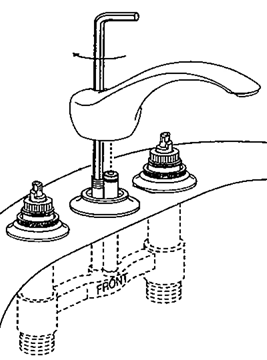
  2. Insert a 7/32" Hex wrench into the lift rod hole in the top of the faucet and rotate counter-clockwise until the spout lifts off. See "Image 1".
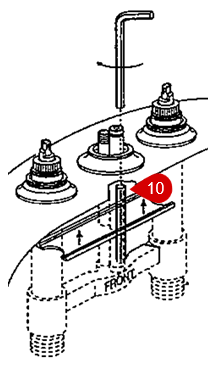
  3. Insert a 1/8" Hex wrench in the clamp screw (narrow hardware tube threaded from top to bottom, see #10) to loosen the hardware. See "Image 2".
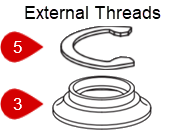
  4. One person will need to push up and hold the valve body from the underside while the other person uses a flathead screwdriver to carefully pry the brass C clip (#5) from the outside of the brass valve body.
  5. Lift the escutcheon (#3) off. There may be putty on the underside which could cause the escutcheon (#3) to be difficult to remove.

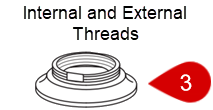
1999-2002: Part #103745

escutcheon after 1999.png

  1. Use pliers on the two flat sides to unthread the escutcheon (#3) counter-clockwise. There may be putty on the underside which could cause the escutcheon (#3) to be difficult to remove.

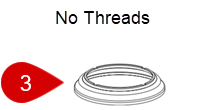
After 2002: Part # 103745

after 2002.png

  1. The escutcheon (#3) lifts off. There may be putty on the underside which could cause the escutcheon (#3) to be difficult to remove.

For additional information on Moen products visit solutions.moen.com and select the type of product you are repairing. The guide will contain repair details, troubleshooting and specific information on assembling handles associated with that style of product.


Still Not Finding What You're Looking For?

Contact Us or Call 1-800-BUY-MOEN           

Non US?  Moen Canada | Other International Sites 

  • Was this article helpful?