Vertical Spa: Independent Transfer Valves
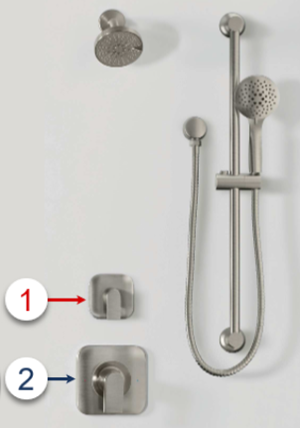 |
What is a Vertical Spa? In 2000 Moen introduced its first line of vertical spa systems. This product launch included small vertical spa systems supporting two devices (the term “device” refers to a showerhead, handheld showerhead, or wall-mounted body sprays). Over the years, with advances in plumbing technology and requests for advanced functionality Moen has produced 7 vertical spa transfer valves. Transfer valves all require a second valve to provide a water supply to the system, these vary based on the year installed and the transfer valve that was chosen. They include ½” Exact Temp, Moentrol, PosiTemp, or M-Core. #1-Independent Transfer Valve: The Transfer valve is responsible for moving water from one shower device to another. The escutcheon/backplate is approximately 4" wide. Independent Transfer Valve Symptoms: The transfer valve can experience symptoms of low flow to a specific device or is not transferring the water flow to another shower system. #2-Mixing Valve: The Mixing valve is responsible for turning the water flow to the entire system on and off and controlling the temperature. Certain mixing valves also control the volume of water. The escutcheon/backplate is approximately 7" wide. Mixing Valve Symptoms: The mixing valve can experience symptoms of a continuous leak or a temperature-specific reduction of flow. What do I need to know to service my Independent Transfer Valve? To use this repair guide you will need to identify which transfer valve is used in your shower. The easiest way is by researching your invoice or installation manuals for the valve numbers. This guide contains repair information on all seven transfer valves. If you are unsure of your transfer valve, the resources below will help with the identification process. Step 1-Reference Chart: This will provide a historical overview of transfer valves and mixing valves systems. Step 2-Identification by Handle Removal: The second option is to remove the #1-Independent Transfer Valve handle, for more information move to Identification by Handle Removal. |
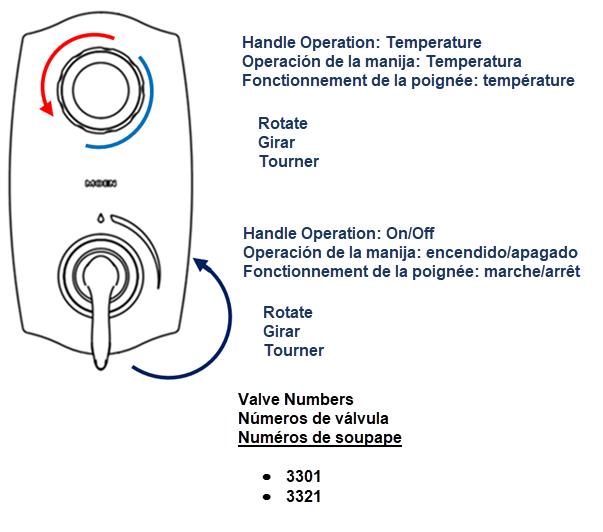
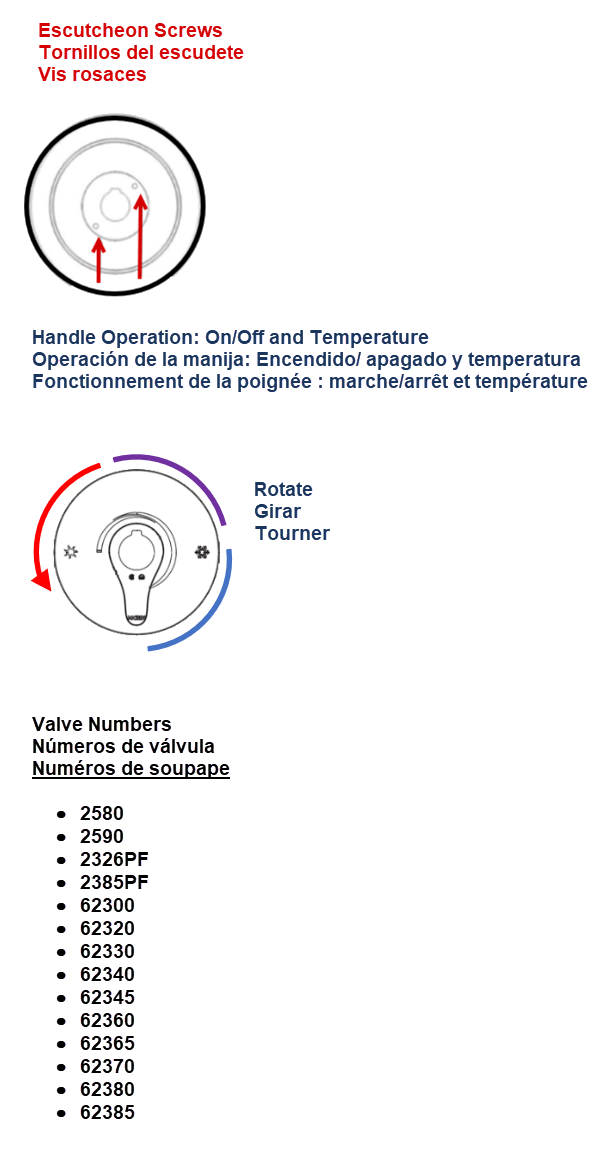
Step 1-Reference Chart |
|
How do I use this chart to identify my Independent Transfer Valve? Review the information you have obtained from your invoice or installation manuals and compare it to the chart below.
|
| CLMN 1: Transfer Valve | CLMN 2: Intro/Retired | CLMN 3: Functions | CLMN 4: Mixing Valve |
|---|---|---|---|
| 3500 | 2000-2006 | 4 Independent and 1 Shared | 1/2" Exact Temp, Moentrol |
| 3372 | 2009-2020 | 2 Independent and 1 Shared | Moentrol, PosiTemp, M-Core 2 or 3 Series |
| 3375 | 2012-2022 | 2 Independent | Moentrol, PosiTemp, M-Core 2 or 3 Series |
| 3360 | 2011 | 3 Independent | Moentrol, PosiTemp |
| 3362 | 2018 | 3 Independent | Moentrol, PosiTemp, M-Core 2 or 3 Series |
| U231 | 2020 | 2 or 3 Independent and 0 Shared | PosiTemp, M-Core 2 or 3 Series |
| U361 | 2020 | 2 or 3 Independent and 1 or 3 Shared | PosiTemp, M-Core 2 or 3 Series |

Step 2-Independent Transfer Valve Identification by Handle Removal |
In this step, you will use the information below to identify your transfer valve. This will require removing the transfer valve trim pieces.