How to Install an Air Gap
|
What is an Air Gap? An Air Gap prevents the backflow of contaminated discharged water into the clean water supply. The use of an Air Gap is required by plumbing codes for certain kitchen fixtures for example a dishwasher or Reverse Osmosis system. Moen recommends installing an Air Gap in two installation scenarios:
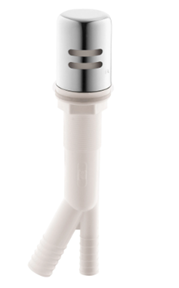
The instructions below will detail how to install Moen's 105895 Air Gap. |
105895
|
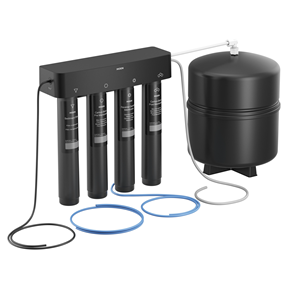
F9900
|
The Air Gap: |
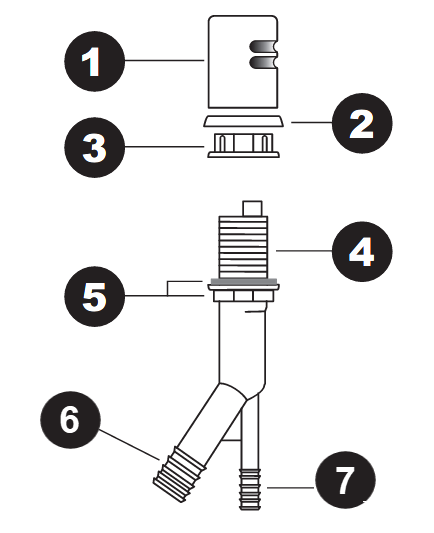
Parts Legend:
|
|
Installing the Air Gap:
|
Connecting the Air Gap: |
Parts Legend from Four- Stage Reverse Osmosis System-INS12980:
|
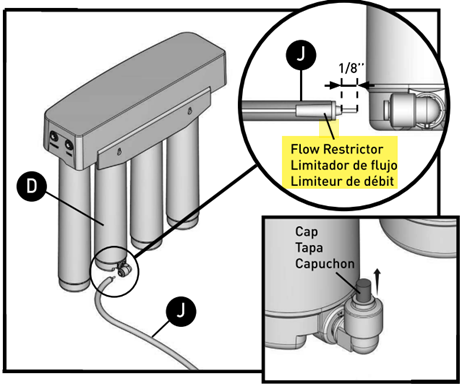
A- Manifold B- Sediment Filter C- Pre-Carbon Filter D- Reverse Osmosis Filter E- Post Carbon Filter
|
F-Manifold Screws G- Tank Elbow H- Cold Water Tee I-1/4" Black Inlet Tube J- 1/4" Blue Air Gap Tube
|
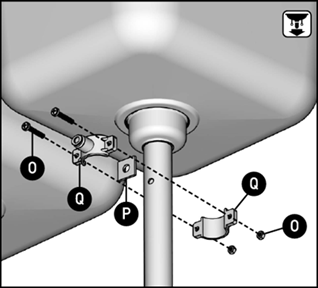
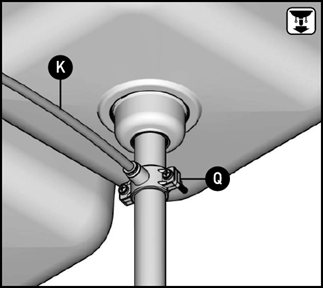
K- 3/8" Blue Air Gap Tube L- 3/8" White Tank Tube M- 3/8" Gray Outlet Tube N-Sealant Tape O- Saddle Screws and Nut
|
P- Foam Seal Q- Drain Saddle R- Tank |
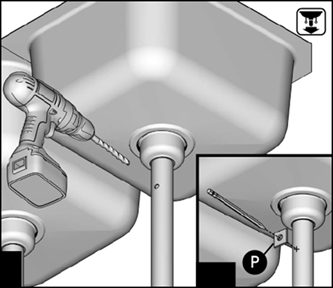
Installing the Saddle:
|
 |
|
 |
Installing the 3/8" Blue Air Gap Tube (K):
|
 |
Installing 1/4" Blue Air Gap Tube (J):
Flow Restrictor:
|
|
For additional information on Moen products visit solutions.moen.com and select the type of product you are repairing. The guide will contain repair details, troubleshooting and specific information on assembling handles associated with that style of product.
Still Not Finding What You're Looking For?
Contact Us or Call 1-800-BUY-MOEN
Non US? Moen Canada | Other International Sites