This article will give the step-by-step instructions for the Moen SecureMount Hardware systems.
|
|
Hardware Installation:
- Hold the grab bar against the wall in the desired location. Use a pencil to mark around the outside of the flanges. Set the grab bar to the side.
- Hold and center the mounting plate (#4) in the mark you just made and mark the center of the mounting plate (#4).
- Drill a 1-1/4" hole over the center mark.
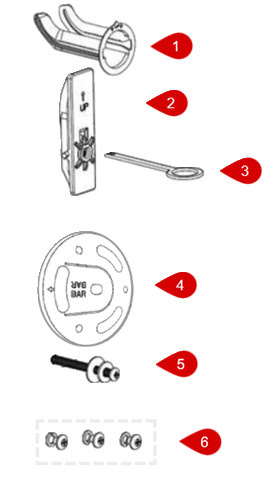
- Confirm the word "Up" on the guide sleeve (#1) is facing up and insert it into the hole.
- Connect the pull tab (#3) to the secure mount anchor (#2). Insert the anchor (#2) with the pull tab (#3) on top into the rails on the guide sleeve (#1).
- Pull back on the pull tab (#3) until it feels snug against the wall. Disconnect the pull tab (#3) from the anchor (#2) by pulling up and tilt from side to side while pulling out on the pull tab (#3).
- Place the silver metal washer followed by the black washer onto the anchor screw (#5).
- Position the mounting plate (#4) in the center of the secure mount anchor (#2). Confirm that the arrow on each of the mounting plates (#4) are facing towards each other.
- Use a Phillips screwdriver to thread and tighten the anchor screw (#5) into the center of the mounting plate.
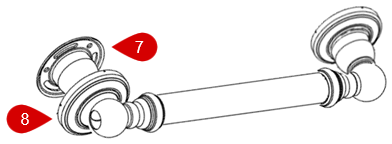
Grab Bar Installation:
- Thread the Phillips screws (#6) into the grab bar bracket (#7).
- Slide and snap the escutcheon (#8) over the grab bar bracket (#7).
|
 |
|
For a comprehensive guide, visit solutions.moen.com and select the type of product you are repairing. The guide will contain specific information associated with that style of product.
Still Not Finding What You're Looking For?
Contact Us or Call 1-800-BUY-MOEN
Non US? Moen Canada | Other International Sites