Cartridge Replacement: 1215 One Handle Wall MountTub Filler
Preparation:
- The water supply shut off valves must be turned off- see article How to Turn Off the Water Supply to the Faucet.
- Recommended Tools: Needle-Nose Pliers, Adjustable Wrench
- We recommend covering the drain before beginning so as not to lose any parts down the drain.
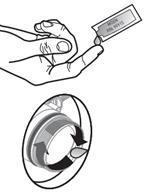
The following instructions assume the handle and associated handle pieces have been removed. For additional details, visit "One Handle Wall Mount Tub Filler: Handle Assembly".
To View Complete Installation Video Visit: One Handle Wall Mount Tub Filler 1215 Cartridge Installation
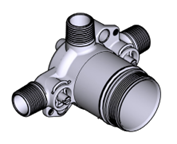
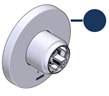
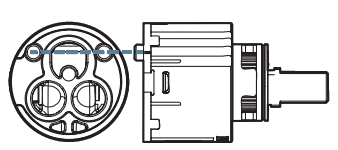
Parts Legend: |
|
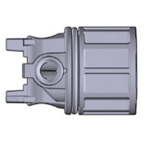
5 Valve Body
|
4 Adapter
|
3 Cartridge
|
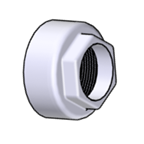
2 Cartridge Nut
|
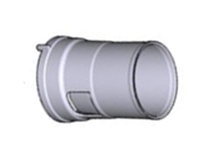
1 Installation Sleeve
|

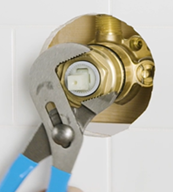
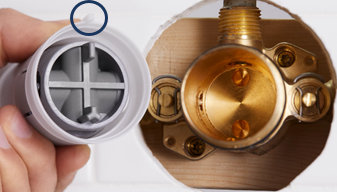
Cartridge Removal and Valve Body Preparation: |
 |
The instructions below are shown with the decorative escutcheon/backplate removed, however, removal is not necessary to complete this repair. |
|
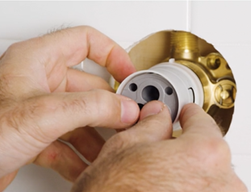
Use an adjustable wrench to unthread the cartridge nut (2) counter-clockwise to remove. |
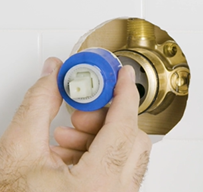
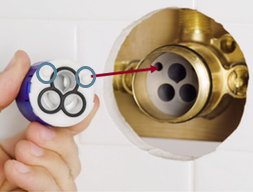
Pull the cartridge (3) out of the brass valve body (5). |
Using needle-nose pliers, remove the adapter (4).
|
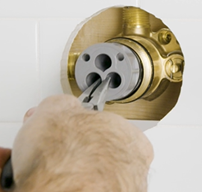
If you notice residue inside the valve body (5) see article, Valve Body Cleaning and Flushing. Apply the lubricant supplied with your 1215 cartridge (# 99915) to grease the outer o-ring and inside of the valve body (5). |
Installing the Cartridge: |
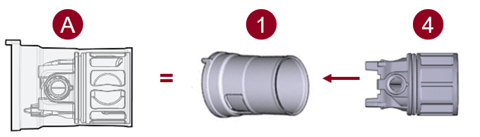 |
Slide the adapter (4) into the installation sleeve (1). |
|
|

For additional information on One Handle Tub Fillers, visit One Handle Tub Fillers: Wall or Deck Mounts.
Still Not Finding What You're Looking For?
Contact Us or Call 1-800-BUY-MOEN
Non US? Moen Canada | Other International Sites