Moen Solutions

How to Install a Pullout or Pulldown Hose

This article will explain how to replace the retractable spray hose on your faucet. This style of hose attaches the spray wand (above the deck) to the faucet body (under the deck).

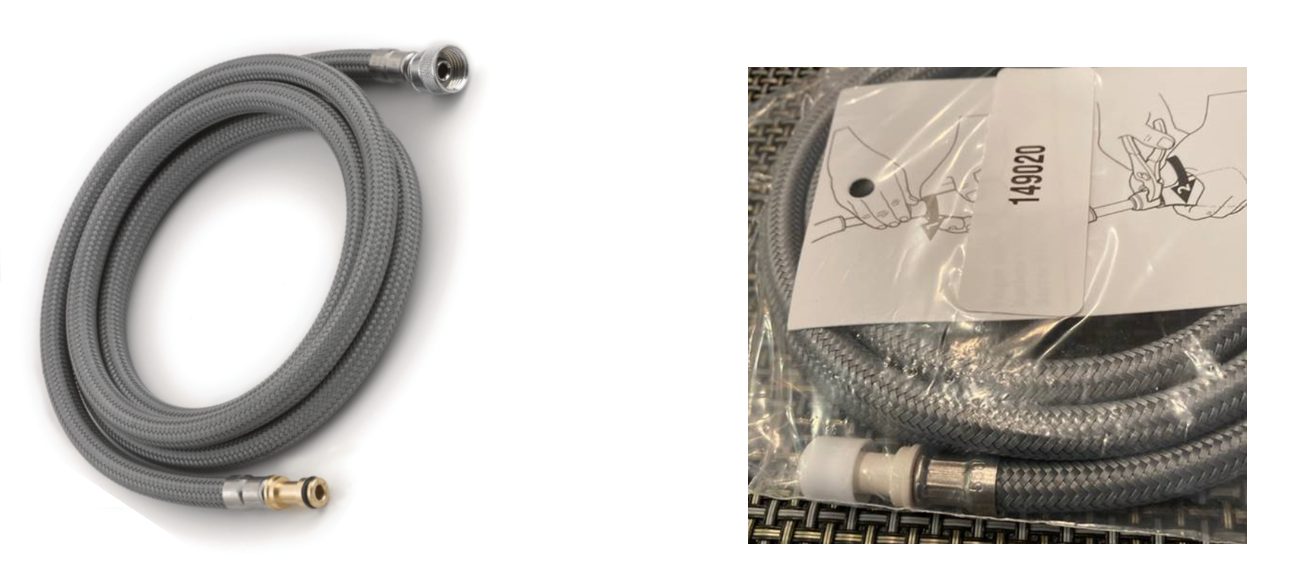
If the hose you are replacing is a 137028,131381,159560 or 150259, here is some information on the changes:

131381 Pullout/Pulldown Hose: (Click here for image)

  • Faucet Hose End (underdeck): The end of the hose that connects to the faucet under the deck will either be brass or non-metallic.
  • Size: The exterior hose diameter has changed.

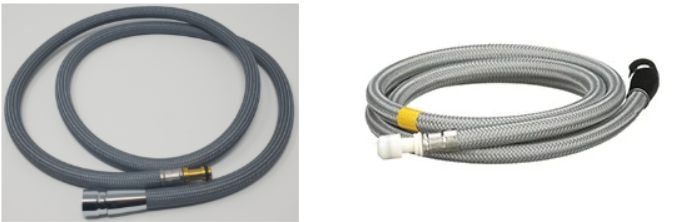
159560 Pullout Hose: (Click here for image)

  • Faucet Hose End (underdeck): The end of the hose that connects to the faucet under the deck will either be brass or non-metallic.
  • Spray Wand Hose End (above deck): The end of the hose that connects to the spray wand, on top of the deck, will either be chrome or non-metallic.
  • Size: The exterior hose diameter has changed.

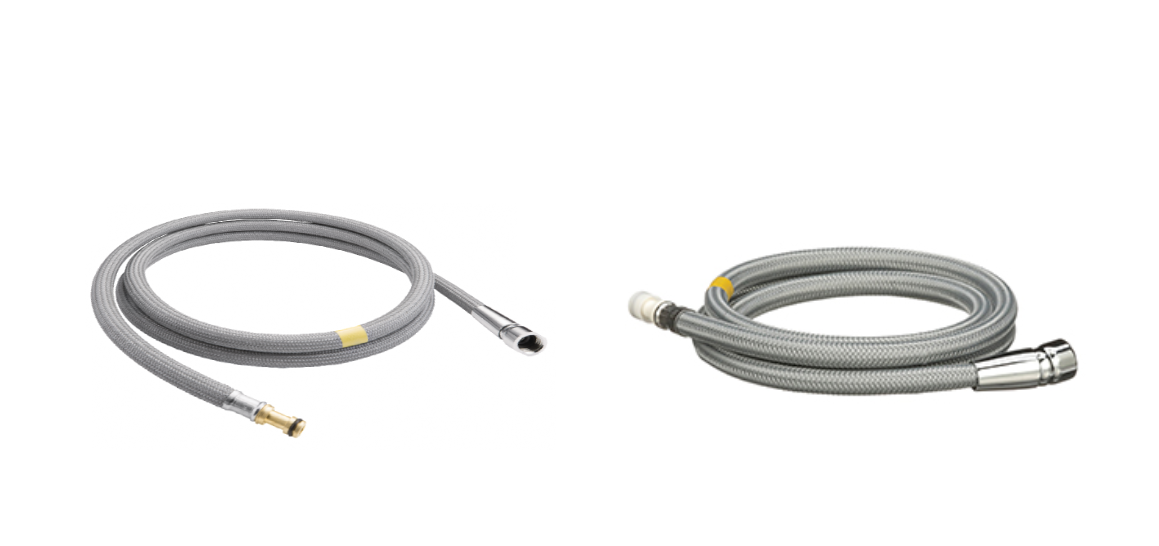
150259 Pulldown Hose: (Click here for image)

  • Faucet Hose End (underdeck): The end of the hose that connects to the faucet under the deck will either be brass or non-metallic.
  • Spray Wand Hose End (above deck): The end of the hose that connects to the spray wand, on top of the deck, will either be chrome or non-metallic.
Hose Styles and Connections

Preparation: The water supply shut off valves must be turned off- see article How to Turn Off the Water Supply to the Faucet.


Moen pullout and pulldown faucets use a variety of hoses which have different connection methods. Use the chart below to determine which connection you have and how to install the hose.

Hoses Style To Disconnect To Connect

Threaded

1991-2003

clipboard_ecd2448f6e3d120aa961ca212d59574cb.png

The faucet hose has one male or female threaded end that threads onto the metal faucet body. 

1. From below the deck, remove the hose weight.

2. Use channel locks or pliers to unthread the hose coupling off of the threaded metal faucet body.

3. From above the deck, grab ahold of the sprayer and pull the hose out through the faucet toward you.

4. Unthread the spray wand counter-clockwise from the hose.

5. If you're re-using the spray wand or the hose, you will need to remove the screen washer. It will be located either inside the spray wand hose end or the threaded end of the spray wand. Use your finger to slide the screen washer out.

1. From above the deck, press the screen washer* into the threaded end of the spray wand. If there was a separate o-ring, slide it in on top of the screen washer.

2. Tighten the spray wand onto the hose.

3. Insert the hose into the opening of the faucet body and feed through.

4. From below the deck, use channel locks or pliers to thread the hose onto the threaded metal faucet body.

5. Install the hose weight onto the hose on the spray wand side a few inches up from the bottom.

 *Click here for additional information on cleaning and installing the screen washer.

Single Quick Connect

 2003-2007 

clipboard_e022da1efcb0c37b078fe16069d426970.png

The faucet hose has a female threaded end that threads onto a plastic single Quick Connect. The Quick Connect is then snapped onto the metal faucet body.

1. From below the deck, remove the hose weight.

2. Disconnect the Single quick connect from the faucet body:

Single Quick Connect Types:

  • Black with white release tab-Squeeze the white tabs together and push the tabs in. Pull the quick connect off of the faucet body.
  • White with black release tab-Press and hold the black button to release the quick connect from the faucet body and pull the quick connect off of the faucet body.

3. Remove the quick connect from the hose by unthreading it from the hose.

4. From above the deck, grab ahold of the sprayer and pull the hose out through the faucet toward you.

5. Unthread the spray wand counter-clockwise from the hose.

6. If you're re-using the spray wand or the hose, you will need to remove the screen washer. It will be located either inside the spray wand hose end or the threaded end of the spray wand. Use your finger to slide the screen washer out.

1. From above the deck, press the screen washer* into the threaded end of the spray wand. If there was a separate o-ring, slide it in on top of the screen washer.

2. Tighten the spray wand onto the hose.

3. Insert the hose into the opening of the faucet body and feed through.

4. From below the deck, thread the quick connect into the hose. 

5. Slide the quick connect onto the faucet body.

  • Black with white release tab-Insert the end of the quick connect over the faucet body and press the white tab in to lock the hose into the faucet body.
  • White with black release tab- Insert the end of the quick connect over the faucet body. There will be an audible click to let you know the faucet body is secure.

6. To test this, gently tug on the quick connect.

7. Install the hose weight onto the hose on the spray wand side a few inches up from the bottom.

 *Click here for additional information on cleaning and installing the screen washer.

Double Quick Connect

2007-2010 

clipboard_eca604ca2410141997278745367e38ad9.png

A Double Quick Connect is a plastic connector that will have two black or two white release tabs. One side will attach to the faucet hose and the other will attach to the metal faucet body.

1. From below the deck, remove the hose weight.

2. Remove the Double quick connect from the hose:

Double Quick Connect Types:

One end of the double quick is attached to the faucet body and one end is attached to the hose. Follow the instructions below to disconnect the end closest to the hose. 

  • Black with white release tab-Squeeze the white tabs together and push the tabs in. Pull the hose from the quick connect.  
  • White with black release tab-Press and hold the black button while pulling the hose out from the quick connect. 

3. From above the deck, grab ahold of the sprayer and pull the hose out through the faucet toward you.

4. Unthread the spray wand counter-clockwise from the hose.

5. If you're re-using the spray wand or the hose, you will need to remove the screen washer. It will be located either inside the spray wand hose end or the threaded end of the spray wand. Use your finger to slide the screen washer out.

1. From above the deck, press the screen washer* into the threaded end of the spray wand. If there was a separate o-ring, slide it in on top of the screen washer.

2. Tighten the spray wand onto the hose.

3. Insert the hose into the opening of the faucet body and feed through.

4. From below the deck, remove and discard the plastic cap from the end of the pullout hose.

clipboard_ed2770b3ca890e41cc47b1279f95acddf.png 

5. Attach the hose back onto the quick connect.

  • Black with white release tab-Insert the end of the quick connect over the faucet body and press the white button in to lock the faucet part in. 
  • White with black release tab- Insert the end of the quick connect over the faucet body. There will be an audible click to let you know the faucet shank is secure.

6. To test this, gently tug on the quick connect.

7. Install the hose weight onto the hose on the spray wand side a few inches up from the bottom.

 *Click here for additional information on cleaning and installing the screen washer.

Built-In Single Quick Connect

2010-Present

clipboard_ecc81ce4c4cf7ec90a21a68f224d06f83.png

An Integrated Single Quick Connect is a plastic connector that is permanently attached to a flexible tube that extends from the faucet body. It will have only one black or white release tab. 

1. From below the deck, remove the hose weight.

2. Remove the hose from the built-in quick connect:

Built-In Quick Connect Types:

  • Black with white release tab-Squeeze the white tabs together and push the tabs in. Pull the hose out of the black quick connect housing. 
  • White with black release tab-Press and hold the black button to release the quick connect from the spray hose and pull the hose out of the white quick connect housing. 

3. From above the deck, grab ahold of the sprayer and pull the hose out through the faucet toward you.

4. Unthread the spray wand counter-clockwise from the hose.

5. If you're re-using the spray wand or the hose, you will need to remove the screen washer. It will be located either inside the spray wand hose end or the threaded end of the spray wand. Use your finger to slide the screen washer out.

1. From above the deck, press the screen washer* into the threaded end of the spray wand. If there was a separate o-ring, slide it in on top of the screen washer.

2. Tighten the spray wand onto the hose.

3. Insert the hose into the opening of the faucet body and feed through.

4. From below the deck, remove and discard the plastic cap from the end of the pullout hose.

clipboard_ed2770b3ca890e41cc47b1279f95acddf.png

5. If using a non-snap on hose weight, install the hose weight. If using a snap on hose weight, move to step 6.

clipboard_ec99284786c37518b3d71989cd47a0368.png

6. Slide the hose into the built-in quick connect:

  • Black with white release tab-Insert the hose into the built-in quick connect and press the white button in to lock the spray hose in.
  • White with black release tab-Insert the hose into the built-in quick connect. There will be an audible click to let you know the spray hose is secure.

7. To test this, gently tug on the quick connect.

8. If using a snap on hose weight, install the hose weight onto the hose on the spray wand side a few inches up from the bottom.

 *Click here for additional information on cleaning and installing the screen washer.


For additional information on Moen products visit solutions.moen.com and select the type of product you are repairing. The guide will contain repair details, troubleshooting and specific information on assembling handles associated with that style of product.


Still Not Finding What You're Looking For?

Contact Us or Call 1-800-BUY-MOEN           

Non US?  Moen Canada | Other International Sites  

  • Was this article helpful?