Pro Fit Hardware System
Preparation:Recommended Tools: Pro-Fit Template Tool YB8081 or Tape Measure, Phillips Screwdriver, Pencil, Level, Drill, 1/4" Drill Bit |
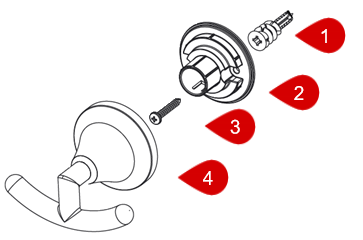
Measuring for Multiple Fixture Posts (#1): |
|
|
With the Pro-Fit Installation Tool:Use the installation tool to locate, level and mark where the holes need to be. Without the Pro-Fit Installation Tool:Measure from the center of one fixture post (#4) to the center of the other fixture post (#4). Use this measurement to know how far apart the mounting posts (#2) need to be and use a pencil and level to mark where the holes need to be located.
|
For a comprehensive guide, visit solutions.moen.com and select the type of product you are repairing. The guide will contain specific information associated with that style of product.
Still Not Finding What You're Looking For?
Contact Us or Call 1-800-BUY-MOEN
Non US? Moen Canada | Other International Sites