This article will explain the process of replacing the wand on a faucet.
Preparation:
Recommended Tools: Pliers, Cloth
|
|
Removal:
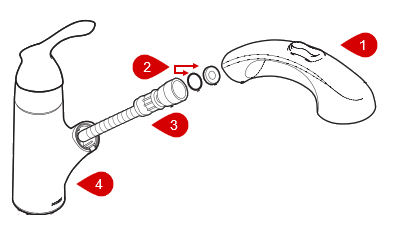
- Gently pull the wand (#1) out from the faucet body (#4) as far as the hose (#3) will allow. To prevent the hose (#1) from accidentally retracting back into the faucet body (#4), tie a cloth around the hose (#3).
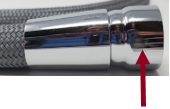
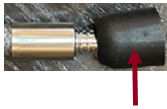
- While holding the metal or black non-metallic coupling (#3) at the end of the hose, use your hand to unscrew the spray wand (#1).
- Remove the screen washer (#2) which will be located in inside the hose's (#3) coupling or the threaded end of the spray wand (#1).
|
Installation:
- Remove the protective cap from the spray wand (#1).
- Place the screen washer (#2) into the spray wand (#1). If there was a separate O-ring (#2), place this in on top of the screen washer (#2).
- Hand-tighten the hose (#3) to the spray wand (#1). Then, using the pliers on the hose (#3) coupling, turn 1/8 of a turn. Turn the faucet on and inspect the connection for leaks. If there is a leak, tighten the connection another 1/8 of a turn.
- Remove the towel from the hose (#3) and set the wand (#1) into the receptor (#4).
|
For additional information on Moen products visit solutions.moen.com and select the type of product you are repairing. The guide will contain repair details, troubleshooting and specific information on assembling handles associated with that style of product.
Still Not Finding What You're Looking For?
Contact Us or Call 1-800-BUY-MOEN
Non US? Moen Canada | Other International Sites