Shower Handle: Moentrol with Integrated Transfer Valve- Handle Type A
Preparation:
- The water supply shut off valves must be turned off- see article How to Turn Off the Water Supply to the Faucet.
- Recommended Tools: Phillips Screwdriver, Pliers
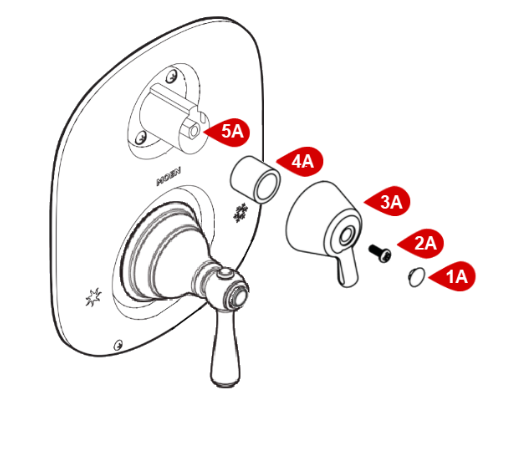
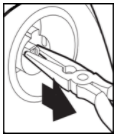
Disassembly: 1. Gently pry the cap (#1A) off of the end of the handle (#3A). 2. Using a Phillips screwdriver, unthread the handle screw (#2A) counter-clockwise and remove the handle (#3A). 3. Slide the spacer (#4A) off the assembly. To replace the cartridge (#5A), see article 1200, 116719 and 162154 Cartridge: Moentrol with Integrated Transfer Valve. Assembly: 1. Confirm that the cartridge clip is installed and use pliers to pull the brass stem of the cartridge (#5A) outward.
2. Rotate the stem of the cartridge (#5A) so the two flat sides of the brass stem are facing to the left and right. 3. Slide the spacer (#4A) onto the assembly. 4. Position the handle (#3A) with the lever facing down, slide the handle (#3A) onto the assembly and use a Phillips screwdriver to thread the handle screw (#2A) clockwise until tight. 5. Push the cap (#1A) back into the handle (#3A). |
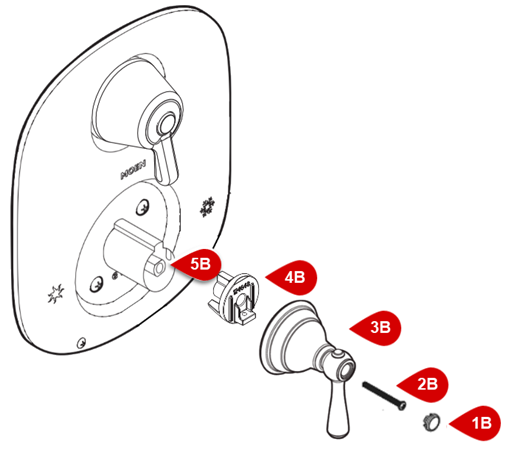
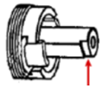
Disassembly: 1. Gently pry the cap (#1B) off of the end of the handle (#3B). 2. Using a Phillips screwdriver, unthread the handle screw (#2B) counter-clockwise and remove the handle (#3B). 3. Slide the adapter (#4B) off the assembly. To replace the cartridge (#5B), see article 1200, 116719 and 162154 Cartridge: Moentrol with Integrated Transfer Valve. Assembly: 1. Confirm that the cartridge clip is installed and rotate the stem of the cartridge (#5B) so the small notch is facing down.
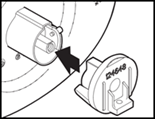
2. Position the handle adapter (#4B) so the numbers on the front of the handle adapter (#4B) are upright and slide it onto the assembly.
3. With the lever of the handle (#3B) facing down, slide the handle (#3B) onto the handle adapter (#4B) and use a Phillips screwdriver to thread the handle screw (#2B) clockwise until tight. 4. Push the cap (#1B) back into the handle (#3B). Note: If after testing you notice the hot and cold are reversed, see article How to Reverse Hot and Cold for a 1225 Cartridge in Shower. |
For additional information on Moen products visit solutions.moen.com and select the type of faucet you are repairing. The faucet guide will contain repair details, troubleshooting and specific information on assembling handles associated with that style of product.
Still Not Finding What You're Looking For?
Contact Us or Call 1-800-BUY-MOEN
Non US? Moen Canada | Other International Sites