Can I Replace My Roman Tub Trim?
This guide will help determine if your current Moen Roman Tub valve will be compatible with our newer trim styles. When replacing Roman Tub trim there are two areas you need to consider. Is the spout compatible? Are the handles compatible? Below will be instructions on how to determine each.
Step One-Will the Spout Fit? |
Always turn your water supplies off before disassembling your faucet. With the supplies turned off, move your faucet’s handle to the “on” position to relieve pressure.
|
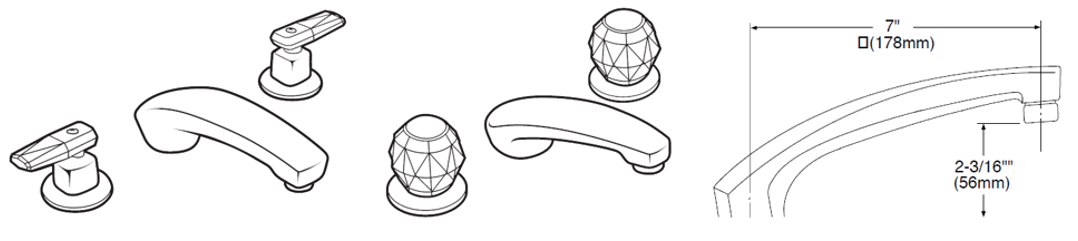
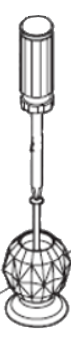
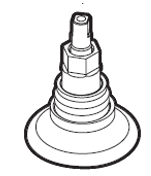
If your fixture looks like either model below and the spout reach is less than 8", you have a Garden Tub. It is not compatible and will not connect to our new Moen Roman Tub trim styles.
|
How to Remove the Spout on Valves Prior to 2008 |
|
Note: If your Roman Tub has a handshower, it will include a spout with a built-in diverter valve. The spout will be compatible. To determine if the handles will be compatible, see Will My Handles Fit. 1. Remove the round plug button from behind the spout. 2. Use a 5/32" Hex wrench to remove the Hex screw from behind the spout. 3. Pull up on the spout to remove the old spout. This may be difficult to remove due to sealant or putty around it. Do not try and rotate the spout when removing it as this can cause damage to the internal parts of the spout. 4. Measure the spout shank. This measurement should be taken from the base of the deck to the top of the spout shank. Some of our newer spouts require longer spout shanks that older models. If the spout shank measures between 1 ⅜” to 1 ½”-Certain spouts will be compatible depending on the height of the spout shank.
If the spout shank measures under 1 ⅜”- New spouts will not be compatible. The entire valve would need to be replaced in order to use any new Moen Roman Tub trim.
|
How to Remove the Spout on Valves After 2008 to the Present |
|
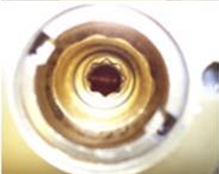
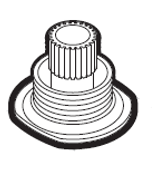
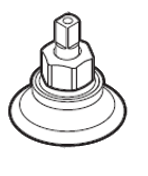
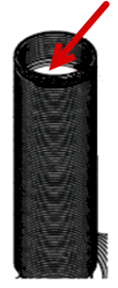
Note: If your Roman Tub has a handshower, it will include a spout with a built-in diverter valve. The spout will be compatible. To determine if the handles will be compatible, see Will My Handles Fit. 1. Remove the round plug button from behind the spout. 2. Use a 5/32" Hex wrench to remove the Hex screw from behind the spout. 3. Pull up on the spout to remove the old spout. This may be difficult to remove due to sealant or putty around it. Do not try and rotate the spout when removing it as this can cause damage to the internal parts of the spout. 4. Measure the spout shank. This measurement should be taken from the base of the deck to the top of the spout shank. Some of our newer spouts require longer spout shanks than older models. 5. Non-diverting tub spouts may have a no-cut adjustable shank. To adjust from a minimum of 1-1/4" to a maximum of 1-3/4", a 3/8" 6" square driver or Moen part number 150313 is required. To determine is this is your spout type, shine a flashlight down into the shank. See image below to determine if your valve has an adjustable shank.
If the spout shank measures between 1 ⅜” to 1 ½”- Certain spouts will be compatible depending on the height of the spout shank.
If the spout shank measures under 1 ⅜”- No new spouts will be compatible. The entire valve would need to be replaced in order to use any new Moen Roman Tub trim. |
Step Two-Will My Handles Fit? |
Remove the Handle |
To determine if the handle will be compatible, it will need to be removed and the handle mechanism examined.
Always turn your water supplies off before disassembling your faucet. With the supplies turned off, move your faucet’s handle to the “on” position to relieve pressure.
|
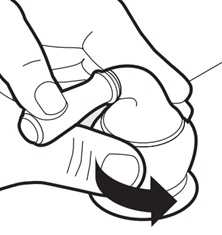
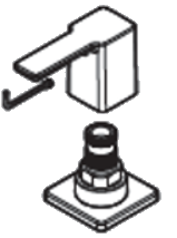
1. Remove the Handle: Moen handle removal varies by model. See the three different handle types below: For additional information on Roman Tubs, visit Roman Tub Deck Mount: Lever or Roman Tub Deck Mount: Knob.
2. Examine the Handle Mechanism (Stem Extension). With the handle removed, what do you see?
|
Roman Tub Spout Height Chart |
| Collection | Model Number(s) | Minimum Spout Shank Height |
|---|---|---|
|
Weymouth |
TS22103 & TS22102 |
1-1/2" |
|
Arris |
TS93003 |
1-1/2" |
|
Waterhill |
TS214 |
1-1/2" |
|
90 Degree |
TS903 |
1-1/2" |
|
Rothbury |
TS923 |
1-1/2" |
|
Icon |
TS963 |
1-3/8" |
|
Wynford |
T657 & T653 |
1-1/2" |
|
Align |
T393 |
1-1/2" |
|
Voss |
T693 |
1-1/2" |
|
Kingsley (High-arc) |
T920 |
1-1/2" |
|
Kingsley (Low-arc) |
T910 |
1-3/8" |
|
Rizon |
T935 |
1-1/2" |
|
Dartmoor |
T683 |
1-1/2" |
|
Glyde |
T373 |
1-1/2" |
|
Brantford |
T933 |
1-3/8" |
|
Brantford (Garden Tub) |
T4943 |
1-3/8" |
|
Eva |
T943 |
1-3/8" |
|
Boardwalk |
T623 |
1-1/2" |
|
Method |
T986 |
1-3/8" |
|
Belfield |
T9023 |
1-1/2" |
|
Gibson |
T961 |
1-1/2" |
|
Traditional |
T4943 |
1-1/2" |
|
Chateau |
T990 & T999 |
1-3/8" |
|
Chateau (Garden Tub) |
4902 |
N/A- Not compatible |
|
Chateau (Garden Tub) |
T994 |
1-3/8" |
|
Doux |
TS983 & TS984 |
1-3/8" |
|
Banbury |
86924 |
1-3/8" |
|
Caldwell |
86440 |
1-3/8" |
|
Adler |
86998 |
1-7/8” |
|
Via |
TS955 |
1-5/8" |
|
Flara |
T928 & T929 |
1-3/8" |
|
Belfield |
T9024 |
1-3/8" |
|
Fina |
TS21704 |
1-3/8" |
|
Genta |
T908 |
1-3/8" |
| Cia | T6223 | 1-5/8" |
|
Still Not Finding What You're Looking For? Contact Us or Call 1-800-BUY-MOEN Non US? Moen Canada | Other International Sites |
|